Protocols - SOPs
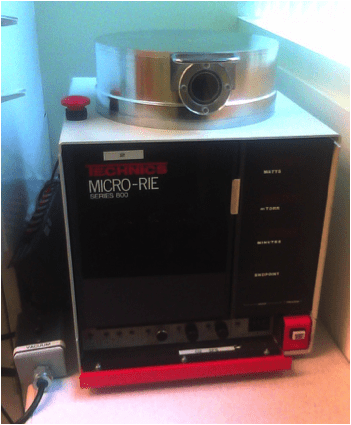
Standard Operating Procedure for the Oxygen Plasma Cleaner (RIE Reactive Ion Etch?)
1. Turn on the Vacuum pump switch at the left of the instrument
2. Turn on the switches labeled RIE and Water on the switch board at the left of the instrument. To turn on the RIE unit, press the button locates on the back/top right corner of the instrument.
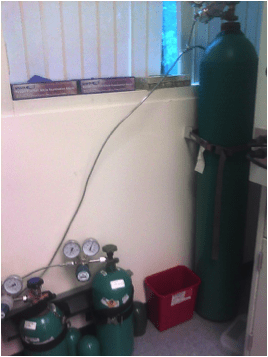
3. Open the gas tanks valves (make sure you are not changing the regulator knobs on the gas tanks, only the Open/Close knobs). For Oxygen plasma cleaning, open the valves for the tanks of Oxygen (the small tank in the center of the image bellow) and Nitrogen (the large tank on the right of the image below).
4. Before starting, turn the Vent switch in the open position (The Vent switch is on the lower switch board of the RIE box) and check the separation between the top enclosure and the platform. The vent flow is not controlled so whenever the top can be lifted, turn off the Vent switch.

5. Lift up the top enclosure with both hands (careful, the top is heavy) and slowly open it up.
6. Place the samples that need cleaning in the center of the platform and lower the top straight down. Make sure the top lines up with the lower part of the enclosure. If needed, wipe the lower platform with an ethanol moistened Kimwipe.
7. Turn on the Vacuum switch on the lower RIE’s box switch board and wait until the pressure reading reaches equilibrium.
8. Flush O2 on your sample by switching the O2 switch to the “On” position. You can regulate the flow of O2 in the chamber by turning the knob in the O2 panel (corresponding to Gas #1). The usual value for the O2 pressure is 300 mTorr. Once the O2 flow has stabilized (this can take 30 sec to 1 minute), turn off the O2 and wait until the chamber goes to the equilibrium pressure. Repeat.
9. Turn the switch on the O2, and wait until the pressure reaches 300 mT, and then turn the plasma power (labeled Power in the switch board). Turn the knob for the desired power (the power we used was of about 100 mW). While the power is on, a bluish arc should be visible in the chamber. Depending on the user’s need, set the timer for the desired time. When the time is up, turn off the power, and then turn off the O2 flow.
10. Flush with N2 3 times before removing samples from the chamber. Careful, the N2 (Vent) has a rather large flow so turning the switch on and off for 1 s is sufficient. Wait until the pressure stabilizes and the repeat.
11. Turn off the vacuum pump from the RIE front panel, and turn on the Vent. Watch carefully the spacing between the top and the lower platform, when the separation is visible, turn off the Vent.
12. Slowly lift up the top, and let it rest open. Pick up the samples, careful not to scratch the platform with the tweezer. Return the top to the closed position. Turn on the vacuum from the switch board until the chamber’s pressure stabilizes. Turn off the RIE (red button on the instrument), and the switches in the extension plug. Turn off the vacuum switch (on the table next to the instrument box) and let air in from the lever on the pump (a quick turn of the lever and back to the original position)
Make sure that when you’re done using the instrument, you close the gas valves on the cylinders.